
There have been reports of users discovering System Restore has been disabled on some Windows 10 installations, and for no obvious reason. Here we will see how to access the System Restore point applet and configure back to default. Of course you can reverse the process to disable it should you have a need to do so.
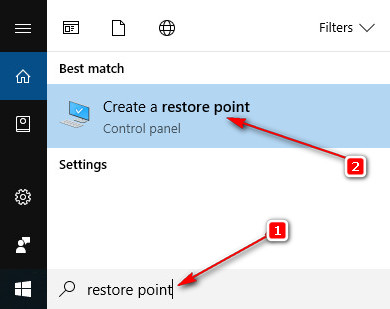
To access the restore point control panel firstly type "Restore point" in the Windows 10 search box and "Create a Restore point" will appear at the top of the available search topics found. Click on it.
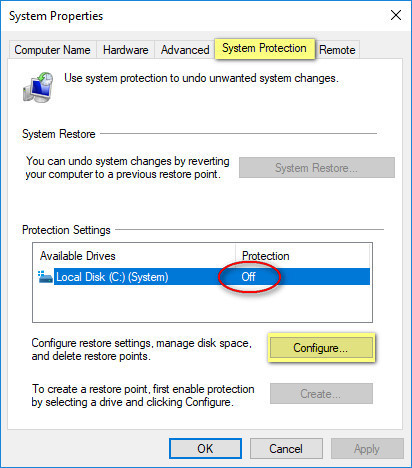
The restore point control panel will open, and under the "System Protection" tab we see Restore points are turned off on the system drive. To fix this click on "Configure"
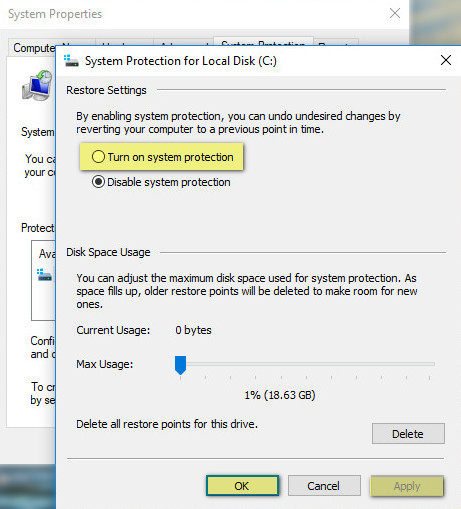
On the new dialogue box change the "Disable system protection" to "Turn on system protection" by selecting the latter's radio button. Do not change the Disk Space Usage options, allow Windows to manage this. Click "Apply" then "OK"
You will be returned to the restore point main control panel screen which now shows the system drive has System Restore enabled.
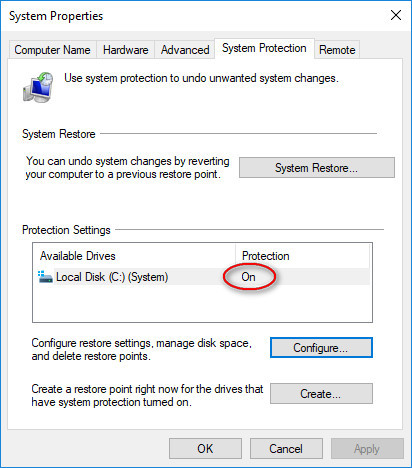
Click "OK" to exit the restore point applet and you're done🙂
To access the restore point control panel firstly type "Restore point" in the Windows 10 search box and "Create a Restore point" will appear at the top of the available search topics found. Click on it.
The restore point control panel will open, and under the "System Protection" tab we see Restore points are turned off on the system drive. To fix this click on "Configure"
On the new dialogue box change the "Disable system protection" to "Turn on system protection" by selecting the latter's radio button. Do not change the Disk Space Usage options, allow Windows to manage this. Click "Apply" then "OK"
You will be returned to the restore point main control panel screen which now shows the system drive has System Restore enabled.
Click "OK" to exit the restore point applet and you're done🙂