There are many applications out there to burn iso images to flash drives and as the occurrences of cd/dvd drives in newer computers is dwindling we depend more on these applications to create bootable copies of images to either run as live programs or as installation media. Whilst users of these image burning apps have their favorites like Rufus, Yumi, Xboot, Universal USB installer and so on, this guide will look at another image burning tool that concentrates on simplicity rather than a fully optioned app such as similar to the ones already mentioned. Etcher will burn several image formats as well as ZIP files which do not have to be extracted first.
The FREE app is called Etcher, and it works on Windows, Mac, and Linux, and comes as an installer or portable (no install) version for both 32 and 64bit systems. Etcher will burn images to Sdcards as well as Flash drives and users may prefer the simple interface and ease of use of Etcher. For this guide we will use the Portable Windows 64 bit version to demonstrate how it works. To give Etcher a try head over HERE and select the version of your choice. If you're not sure if your system is 32 or 64bit go HERE to find out how to tell.
Once installed or if you choose the portable version and download that to your desktop, you will have a Etcher shortcut on it.

If you see a User account dialogue at any time asking if you wish to open Etcher, you can safely allow it.
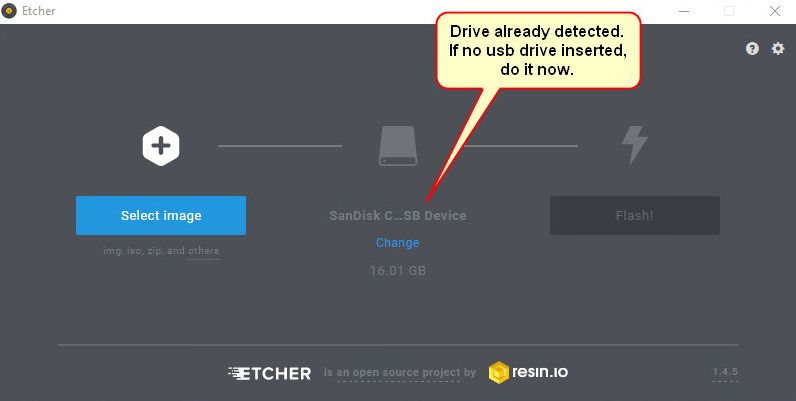
Double click the icon to open Etcher and it will open with a simple dialogue box with only three selection buttons needed to complete our task. No configuration of Etcher should be necessary as the default options should suit most users. In the picture below Etcher has already detected we have plugged in a flash drive.
WARNING: Etcher, or any other image burning application for that matter will remove any data from the chosen flash drive when the new image file is burned, so ensure there is no needed data on the drive before proceeding.
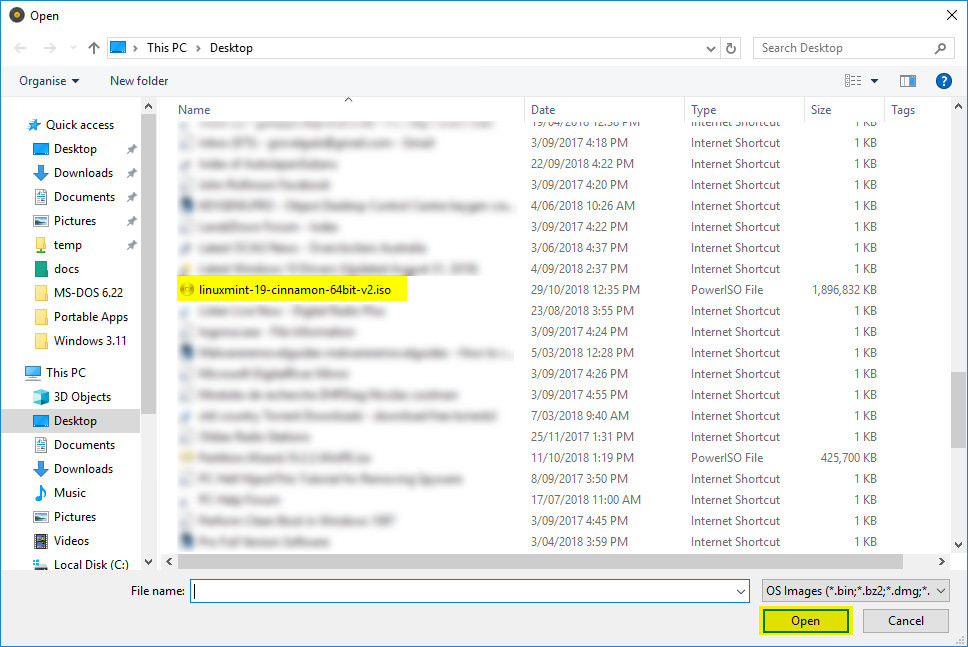
Say we wish to make a bootable Linux USB from an ISO file we have, click on "Select Image" and navigate to the ISO, select it and click "Open".
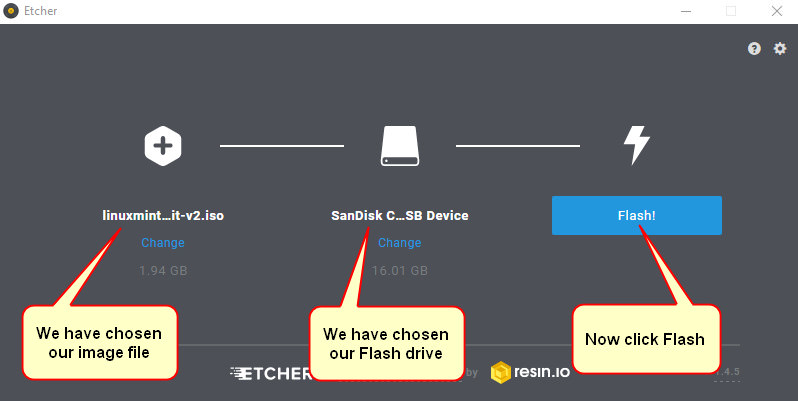
Now click "Flash" and the burn will commence.
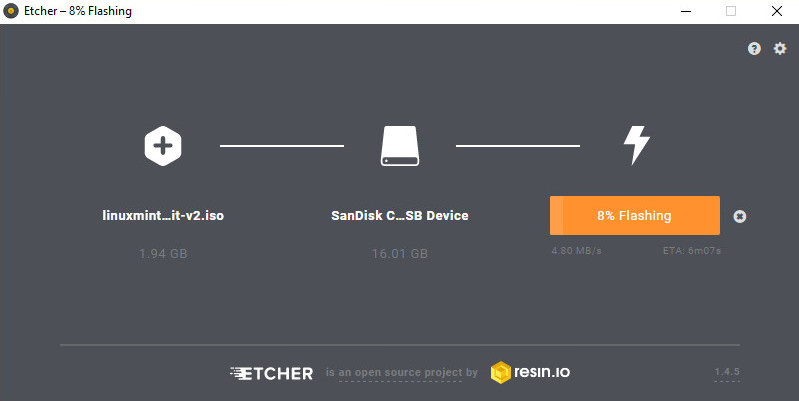
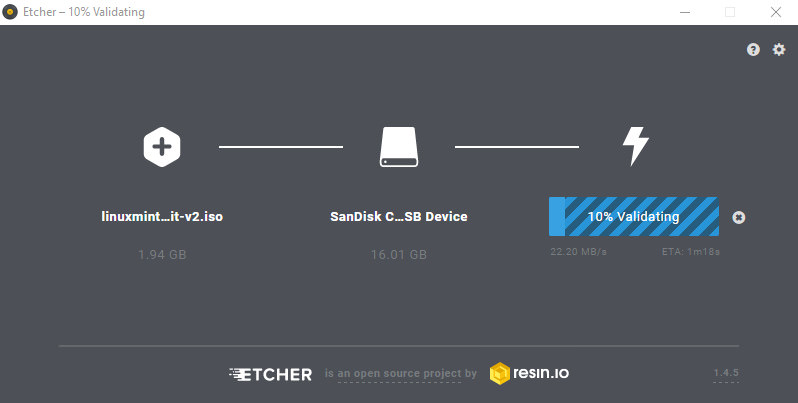
The Flash button will change color and show the progress of the image creation along with an estimate of the time remaining.
Another nice feature of Etcher is that when the flashing is complete it automatically validates the burned image to ensure a perfect copy. This makes the creation of the bootable image take longer, but it ensures it will work.
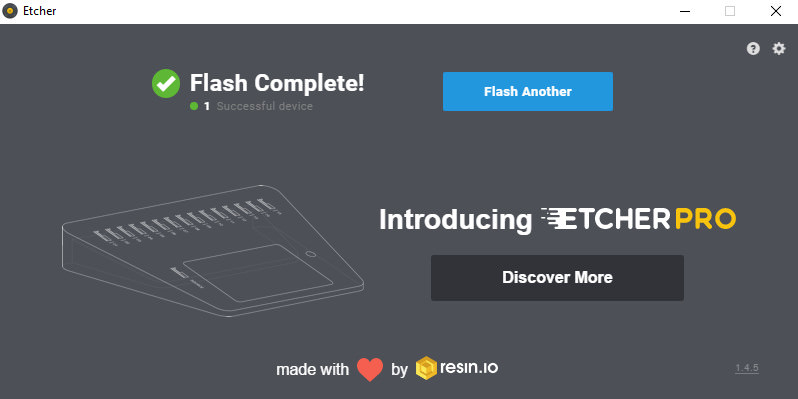
After the validation ends, that's all there is to it, success. Close the "Flash complete" dialogue box and you're newly created USB flash drive is ready to use.
For more advanced users this app may disappoint due to its simplicty preventing "persistence" being added to burned images. This "persistence" allows changes to be made and saved to the burned image. With that exception in mind both new users to creating USB/sdcard images, and those looking for something really simple should like this free application.
We hope this guide has helped and if you have any questions about it, or any other computer issues please don't hesitate to ask in our forums.")
The FREE app is called Etcher, and it works on Windows, Mac, and Linux, and comes as an installer or portable (no install) version for both 32 and 64bit systems. Etcher will burn images to Sdcards as well as Flash drives and users may prefer the simple interface and ease of use of Etcher. For this guide we will use the Portable Windows 64 bit version to demonstrate how it works. To give Etcher a try head over HERE and select the version of your choice. If you're not sure if your system is 32 or 64bit go HERE to find out how to tell.
Once installed or if you choose the portable version and download that to your desktop, you will have a Etcher shortcut on it.

If you see a User account dialogue at any time asking if you wish to open Etcher, you can safely allow it.
Double click the icon to open Etcher and it will open with a simple dialogue box with only three selection buttons needed to complete our task. No configuration of Etcher should be necessary as the default options should suit most users. In the picture below Etcher has already detected we have plugged in a flash drive.
WARNING: Etcher, or any other image burning application for that matter will remove any data from the chosen flash drive when the new image file is burned, so ensure there is no needed data on the drive before proceeding.
Say we wish to make a bootable Linux USB from an ISO file we have, click on "Select Image" and navigate to the ISO, select it and click "Open".
Now click "Flash" and the burn will commence.
We hope this guide has helped and if you have any questions about it, or any other computer issues please don't hesitate to ask in our forums.