ISO files are becoming an increasingly popular way of distributing software, and perhaps you would like to learn more about exactly what they are and how to manipulate them. First of all we should look at what an ISO is and why they are so common.
What is an ISO?
The name ISO was taken from a standard used for CD media file systems, namely ISO 9660. In a nutshell an ISO contains all the files that would have been on a CD/DVD software program disc, but merged into only one file. ISO's first came in to being in the days of CD’s but later included DVD’s etc. Even though we could always have copied all the folders and files on a disc, sometimes in their thousands, an ISO contained all the files in one non compressed file that meant individual files had less chance of becoming lost or corrupted during handling. Providing care was taken during the creation of the ISO unlimited copying or handling of the ISO file would result in a reliable copy.
Burning and Mounting ISO’s.

This Dialogue box will appear, place a CD or DVD in your drive and click “Burn” If you select “Verify” the written disc will be checked against the original file for accuracy, and therefore highly recommended.

Mounting ISO's
The term “MOUNTING” is commonly used in association with ISO files and simply means to be able to look inside an ISO file and get access to the folders and files contained in them. Mounting actually loads the ISO file as a virtual CD/DVD.
Right click the .exe and select “run as administrator” accept the user account warning if applicable, and allow the driver and app to be installed.
Using the app is very straight forward, navigate to the ISO file you wish to mount and simply double left click it and the following dialogue box will open.

The default options should be fine for most users, but if necessary change to your preferences. Click OK. Another dialogue box will open and show any available options for the particular ISO file.


Here you can view, cut, copy, and carry out many folder and file actions like any other Explorer window.

To "Unmount" the ISO right click on the Virtual drive and select "Eject" from the menu.
We hope this guide has given you a basic understanding of ISO's and help you use and manage them
If you have any questions about this guide or any other computer issues please don't hesitate to ask in our forums.
What is an ISO?
The name ISO was taken from a standard used for CD media file systems, namely ISO 9660. In a nutshell an ISO contains all the files that would have been on a CD/DVD software program disc, but merged into only one file. ISO's first came in to being in the days of CD’s but later included DVD’s etc. Even though we could always have copied all the folders and files on a disc, sometimes in their thousands, an ISO contained all the files in one non compressed file that meant individual files had less chance of becoming lost or corrupted during handling. Providing care was taken during the creation of the ISO unlimited copying or handling of the ISO file would result in a reliable copy.
Burning and Mounting ISO’s.
Burning ISO's
“BURNING” an ISO as the name infers means to use an existing ISO file and “BURN” that file to a CD or DVD. To make a copy or BURN an existing ISO file in Windows 7, 8, and 10 fire up either Windows or File Explorer, navigate to the ISO then simply right click the ISO file and choose “Windows Disc Image Burner” or "Burn Disc Image" depending on your version of Windows, from the menu. If you have more than one application that can do the task, select it from the “Open With” menu.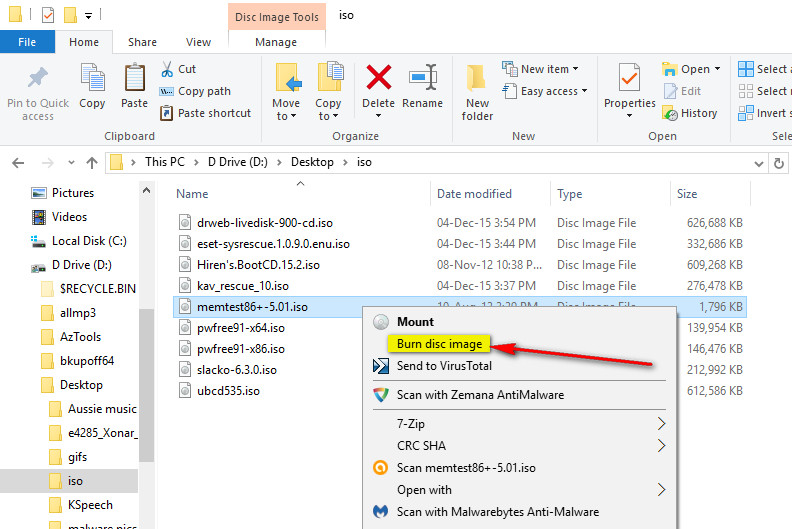
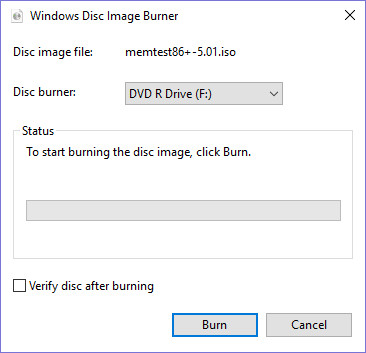
This Dialogue box will appear, place a CD or DVD in your drive and click “Burn” If you select “Verify” the written disc will be checked against the original file for accuracy, and therefore highly recommended.
Mounting ISO's
The term “MOUNTING” is commonly used in association with ISO files and simply means to be able to look inside an ISO file and get access to the folders and files contained in them. Mounting actually loads the ISO file as a virtual CD/DVD.
Mounting ISO's in Windows 7
With versions of Windows up to and including Windows 7 it is necessary to use 3rd party, or add on software to access files contained within an ISO file. There are many commercial and free offerings to choose from and for this tutorial we will use “WinCDEmu” a free offering that works on every version of windows from XP onwards including both 32 and 64 bit systems. Download the software from HERE Right click the .exe and select “run as administrator” accept the user account warning if applicable, and allow the driver and app to be installed.
Using the app is very straight forward, navigate to the ISO file you wish to mount and simply double left click it and the following dialogue box will open.
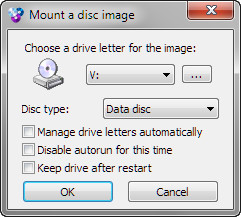
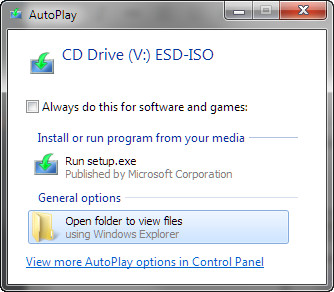
The default options should be fine for most users, but if necessary change to your preferences. Click OK. Another dialogue box will open and show any available options for the particular ISO file.
Mounting ISO's in Windows 8 and up
To mount an ISO you can either double left click on the ISO or right click on it and select "Mount" from the menu.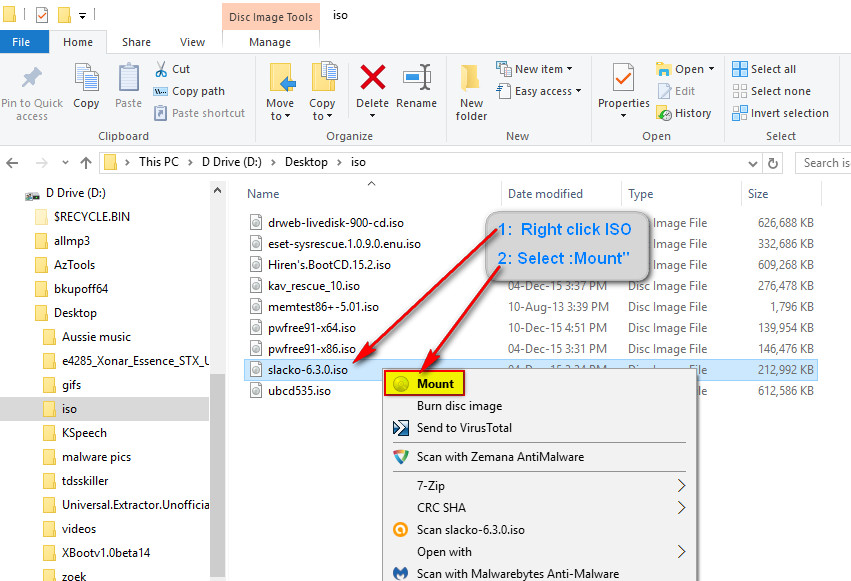
Here you can view, cut, copy, and carry out many folder and file actions like any other Explorer window.
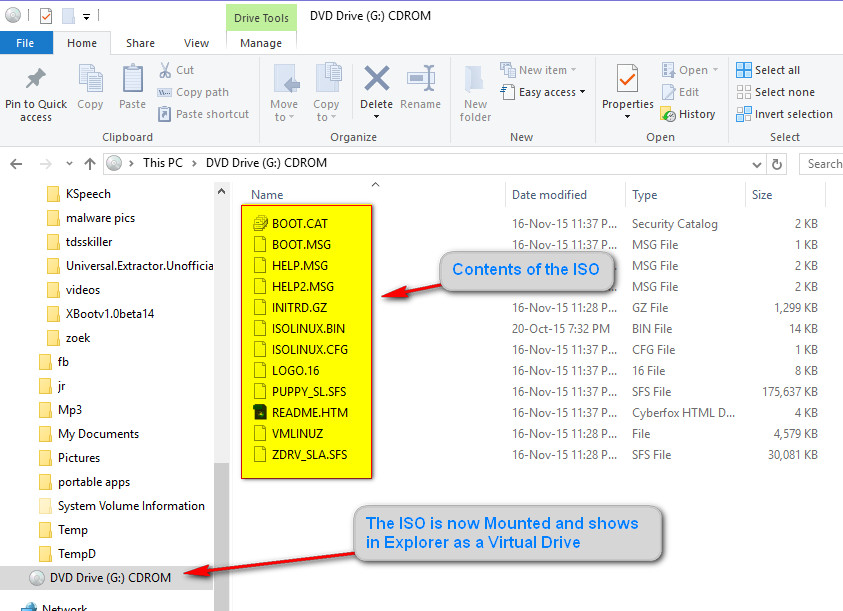
To "Unmount" the ISO right click on the Virtual drive and select "Eject" from the menu.
We hope this guide has given you a basic understanding of ISO's and help you use and manage them
If you have any questions about this guide or any other computer issues please don't hesitate to ask in our forums.
