Have you ever wanted to make your own iPhone ringtone? It's not as hard as you might think it is. Follow the steps below and you'll have your own ringtone for your iPhone 
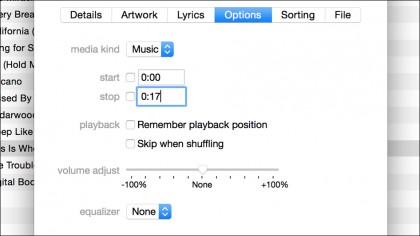
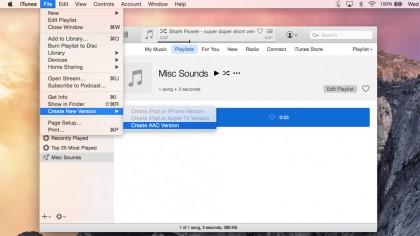
2. Highlight the song, then hit Command + I to get info. Click on the Options tab, and adjust the start and stop times to capture the portion of the song you want as your tone. (If it's less than 30 seconds, there's no need to do this) Once you've adjusted the length, export the edited song by clicking on File > Create New Version > Create AAC version. You must do this even if the file was already in AAC format! (Also, after you've made the copy, be sure to deactivate the start/stop options from the original version of the song so it will play normally the next time you listen to it.)
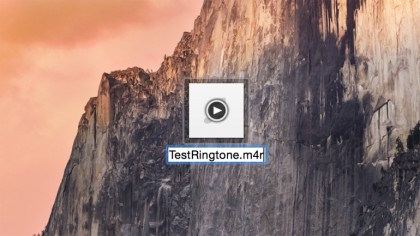
3. Locate the newly created AAC version in the finder; you should find it in Music > iTunes > iTunes Media > Music > [artist name] > [album name] > [song name], possibly with a "1" added onto the file name. Copy the file and put it somewhere convenient, such as the desktop, then change its file extension from .m4a to .m4r.
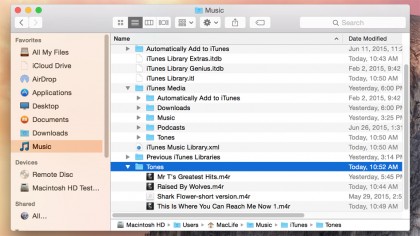
4. Drag the file to the Tones folder (Music > iTunes > Tones), then open it by dragging it to iTunes or double-clicking it. Navigate to the Tones section of iTunes (hit Command + 8 for easy access) and you should see the ringtone there.
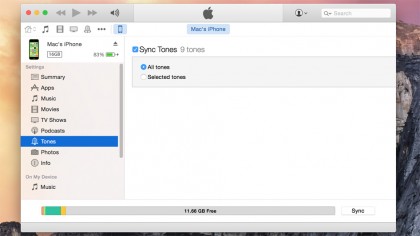
5. You need to sync it to your iPhone. Connect your iPhone to your Mac, go to the device tab by pressing the button in the upper-left, select the Tones section, then check "Sync Tones" (all tones or selected tones is up to you). When you sync your phone, the ringtones will copy over.
- Open the sound file you want to set as your ringtone in iTunes on your Mac. You'll need to export a copy of the song and edit it to a length of 30 seconds or less if necessary. You can edit within iTunes and then export, or, if you wish, you can edit with an additional app (such as QuickTime) after exporting.


