Recently we demonstrated how to create a bootable Linux flash drive that could save changes to the live operating system (called persistence) meaning changes weren't lost when the system was shut down. In this guide we will create a bootable flash drive with a menu driven boot menu allowing us to selelect a live Linux distribution to use, or install them if we choose, and still retaining the advantage of persistence with each version that is compatible with persistence.
It must be stated that NOT ALL Linux distributions are compatible with persistence as we will demonstrate.
For this guide we will create a flash drive with the following Linux ISO files, of course you can use whatever distros you prefer.

To begin the procedure it is recommended you remove all other connected USB devices leaving only your USB flash drive you intend using to put the Linux distros on connected to your PC. This will lessen the chance of writing to a wrong USB device and losing data on it. Open YUMI and accept the license agreement.
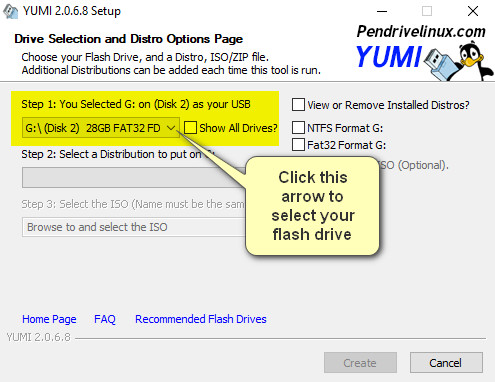
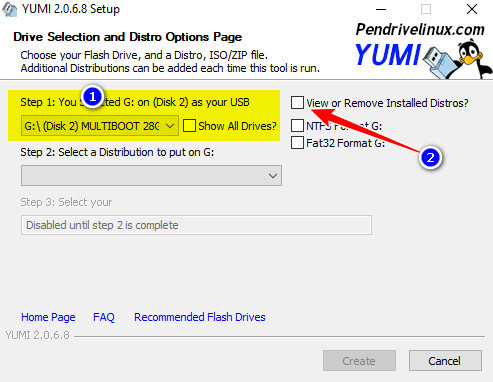
Once YUMI is up and running tick the down arrow to the right of the USB selection box in step 1, then select your flash drive. This computer shows the flash drive as drive G, but yours may be different.
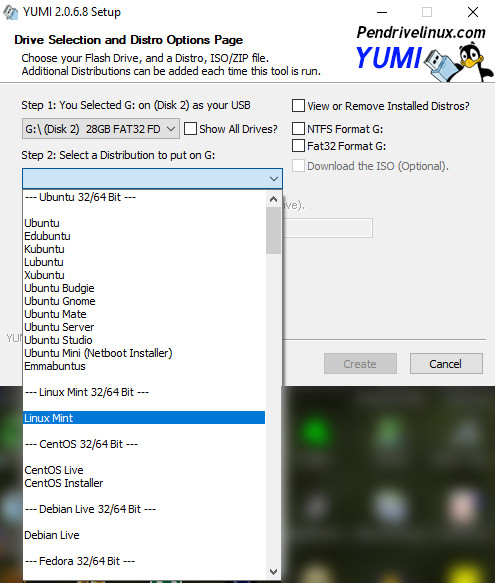
Now click the down arrow to the right of the distribution selection box in step 2 and select the Linux distro you would first like to put on your flash drive. We will opt to put a copy of Linux Mint on first so select it from the drop down list. This will insert Linux Mint into the selection box.
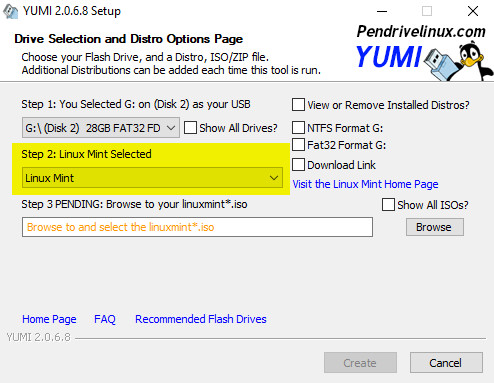
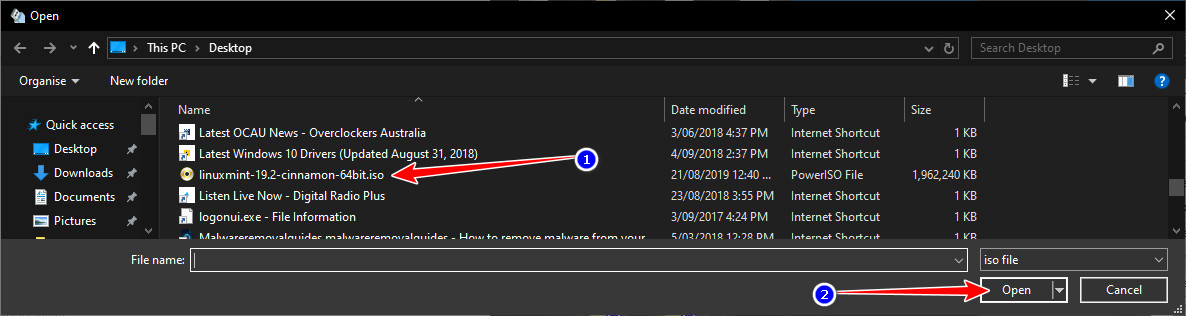
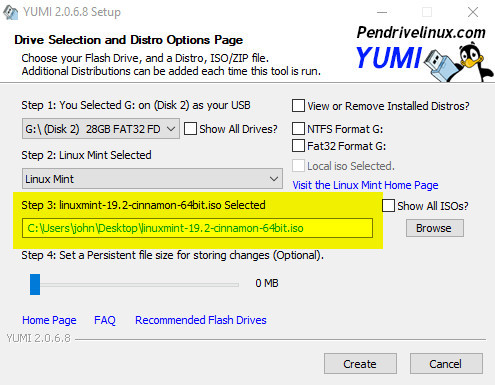
To complete step 3 click the browse button to the right of the browse and select box. This will open a Windows file explorer box where you can navigate to find your copy of Linux Mint. Highlight the file and select open.
Your selected distribution will now be displayed in the step 3 box.
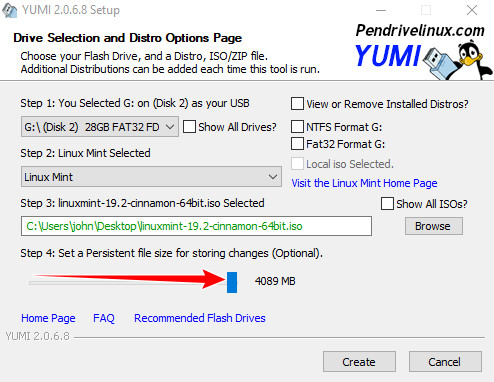
Because Linux Mint supports persistence an additional step 4 will now appear, and here we choose to have persistence or not, and if so how much. To put Mint onto the flash drive without persistence just leave the slider at zero, or in this instance we will choose to have the maximum persistence space of 4GB by moving the slider to the right. Now click the Create button.
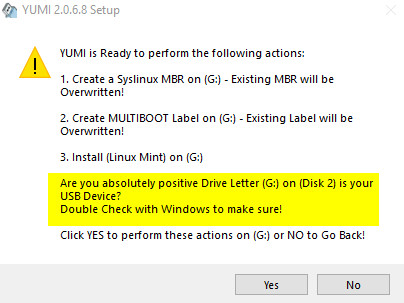
YUMI will display a summary of what is about to be written to the chosen USB drive. Please check this carefully as proceeding and writing to the incorrect drive will permanently destroy any data on that drive. Remember that your drive may not be drive G as shown on this computer. If all appears correct click Yes.
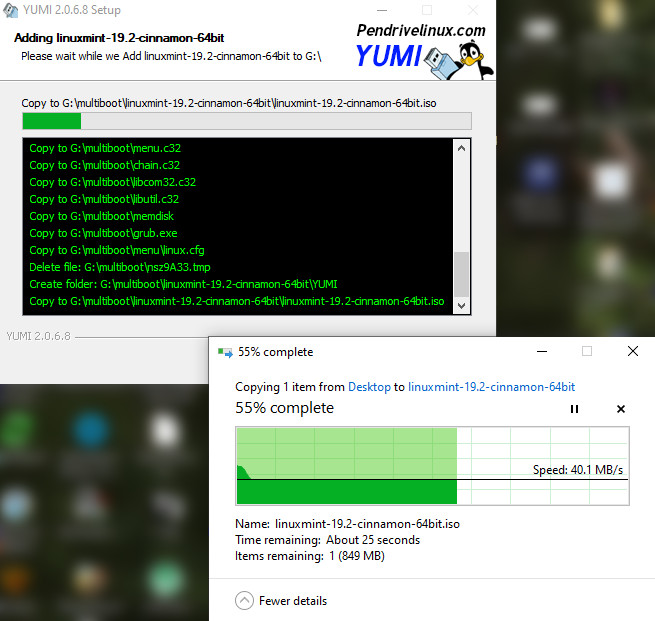
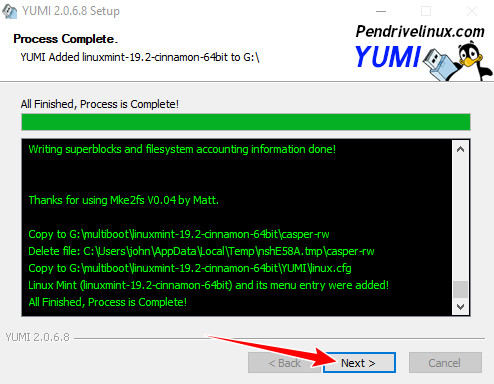
The progress boxes showing writing to the flash drive will display.
When complete click Next.
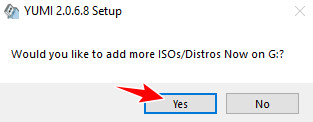
Now we are asked if we wish to add more distributions to our flash drive. Should you wish to add more distributions click Yes, or No to finish. Here we will opt to add another.
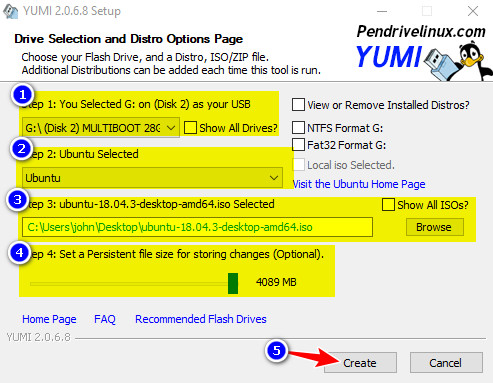
This will take us back to the opening screen of YUMI, so repeat steps 1 as above. This time we will put Linux Ubuntu on our flash drive so select it in step 2. In step 3 navigate to your ISO copy of Ubuntu and select it as we did previously for Mint. Set your preferred persistence and click Create.
Again you will be asked if you would like to write more distributions to your flash drive, so choose to or not. This time we will choose not to add more now. It's easy to add them later, simply start YUMI as you did originally and just add more as we did to start. Let's add one more, this time Linux Puppy.
Start YUMI as before, accept the license agreement.
Select your flash drive drive letter, Select your distribution, and navigate to its ISO file. Note below that Puppy has no persistence setting available as this version of Linux is not compatible with persistence, meaning changes made to Puppy will not be saved after shutdown. Click Create after you review your proposed changes.

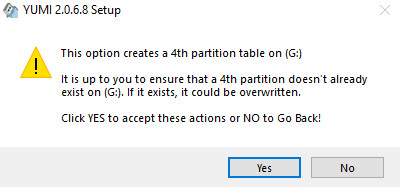
Because we are adding another distribution after restarting YUMI we are asked if another partition can be created, select yes.
Linux Puppy will now be added to your bootable flash drive.
You can now continue to add distributions as above, or close YUMI and test it out. Of course you can always add more distros later as long as your flash drive has enough space.
To test out our new bootable menu driven USB first plug the USB into a computer and boot it. Depending on your motherboard you will have to tap a keyboard key whilst your machine is booting to select your USB boot drive. You will have to check your motherboard manual or internet to find the key to access your boot menu, but for Example for Gigabyte boards it's F12 and Asus it's F8.
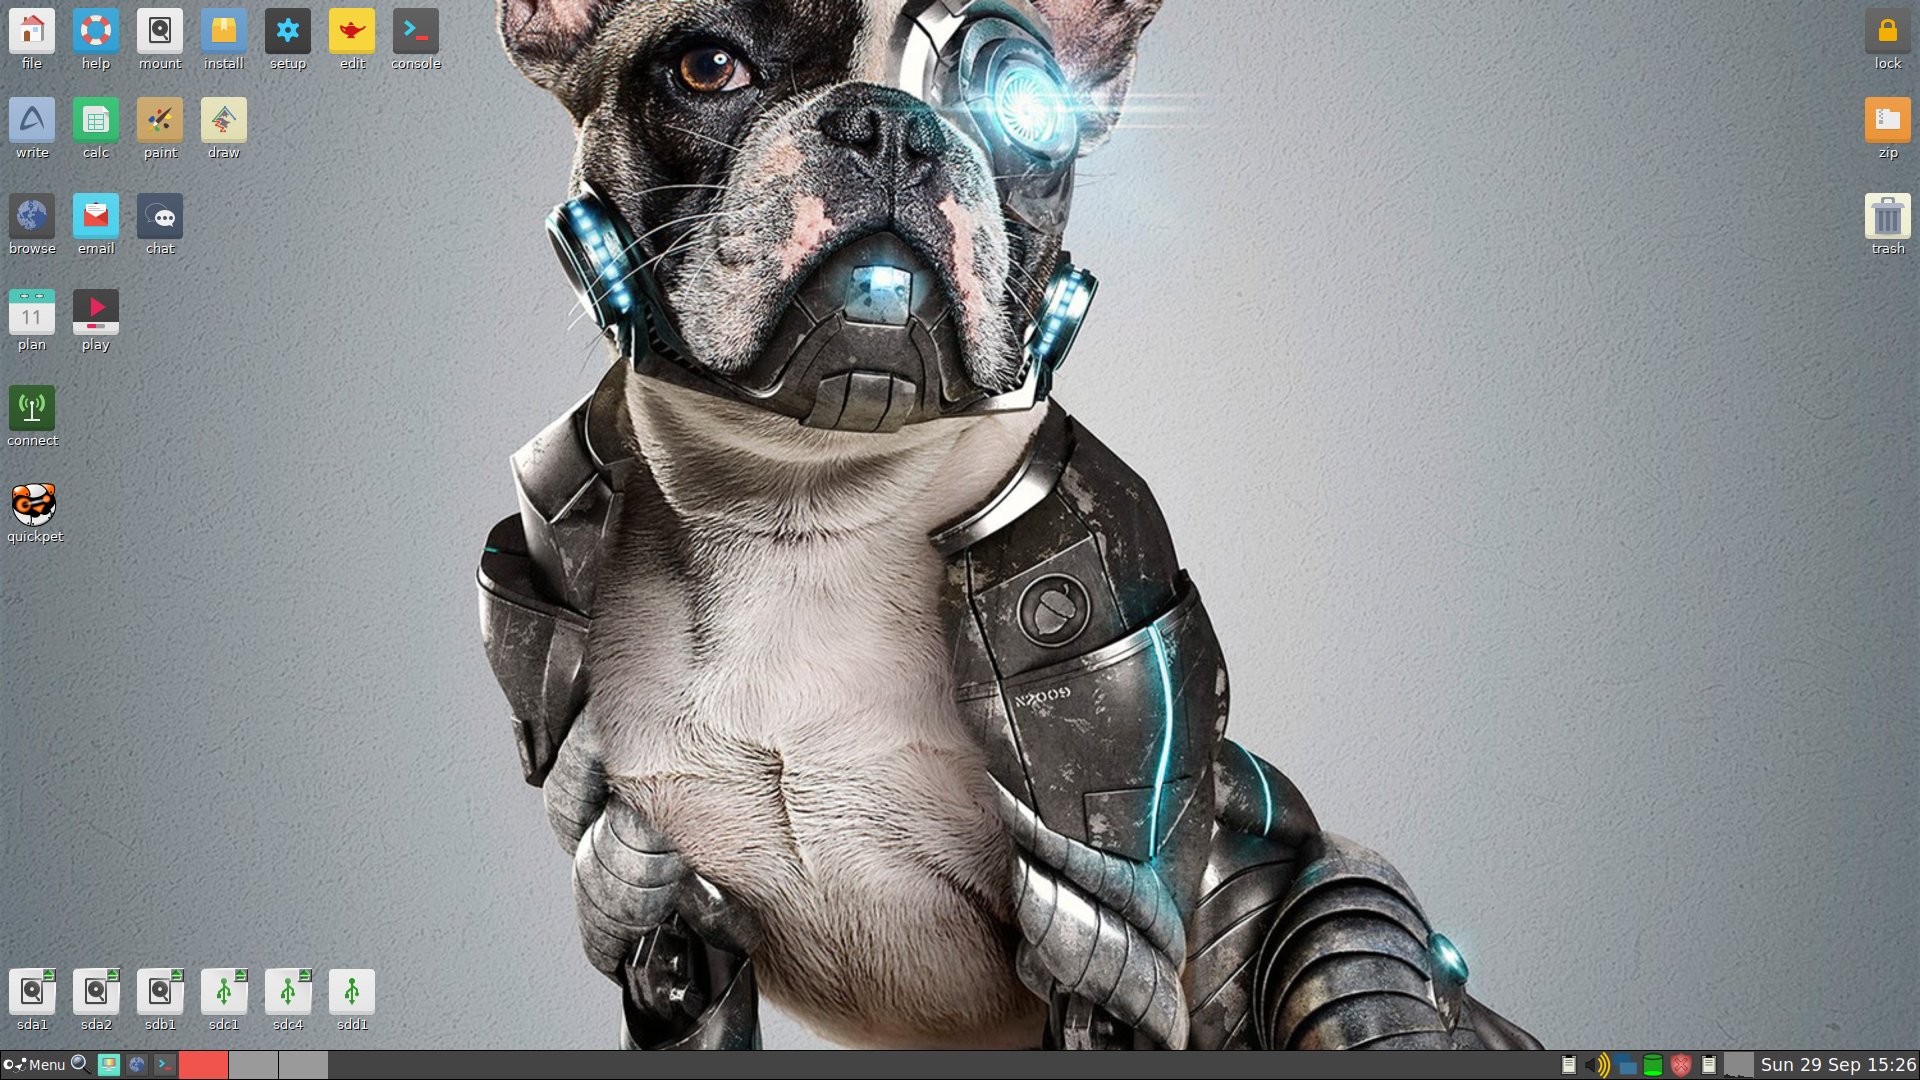
Here is a typical boot menu
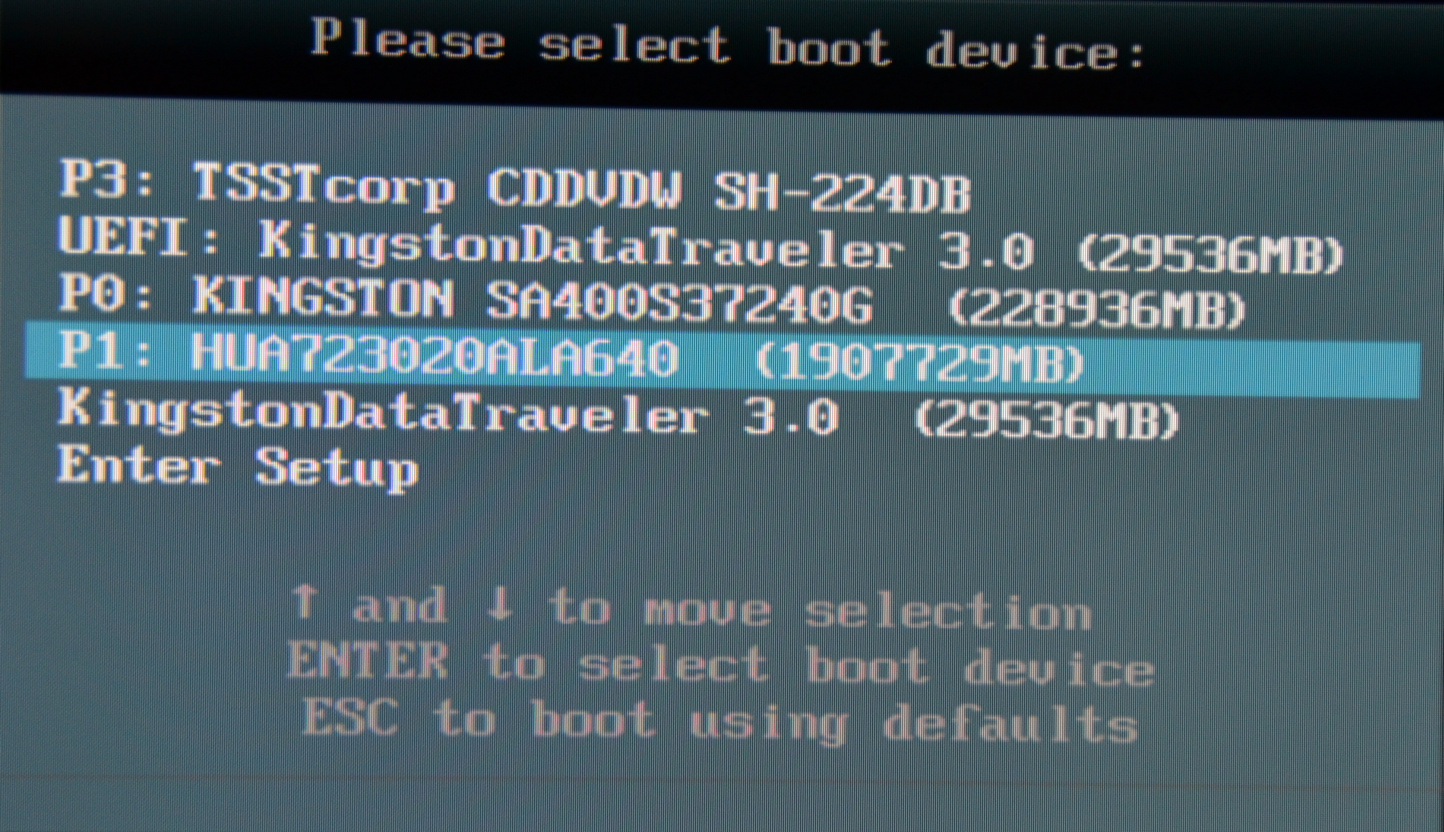
After selecting your flash drive a menu will appear, use the down arrow button to select Linux distributions.
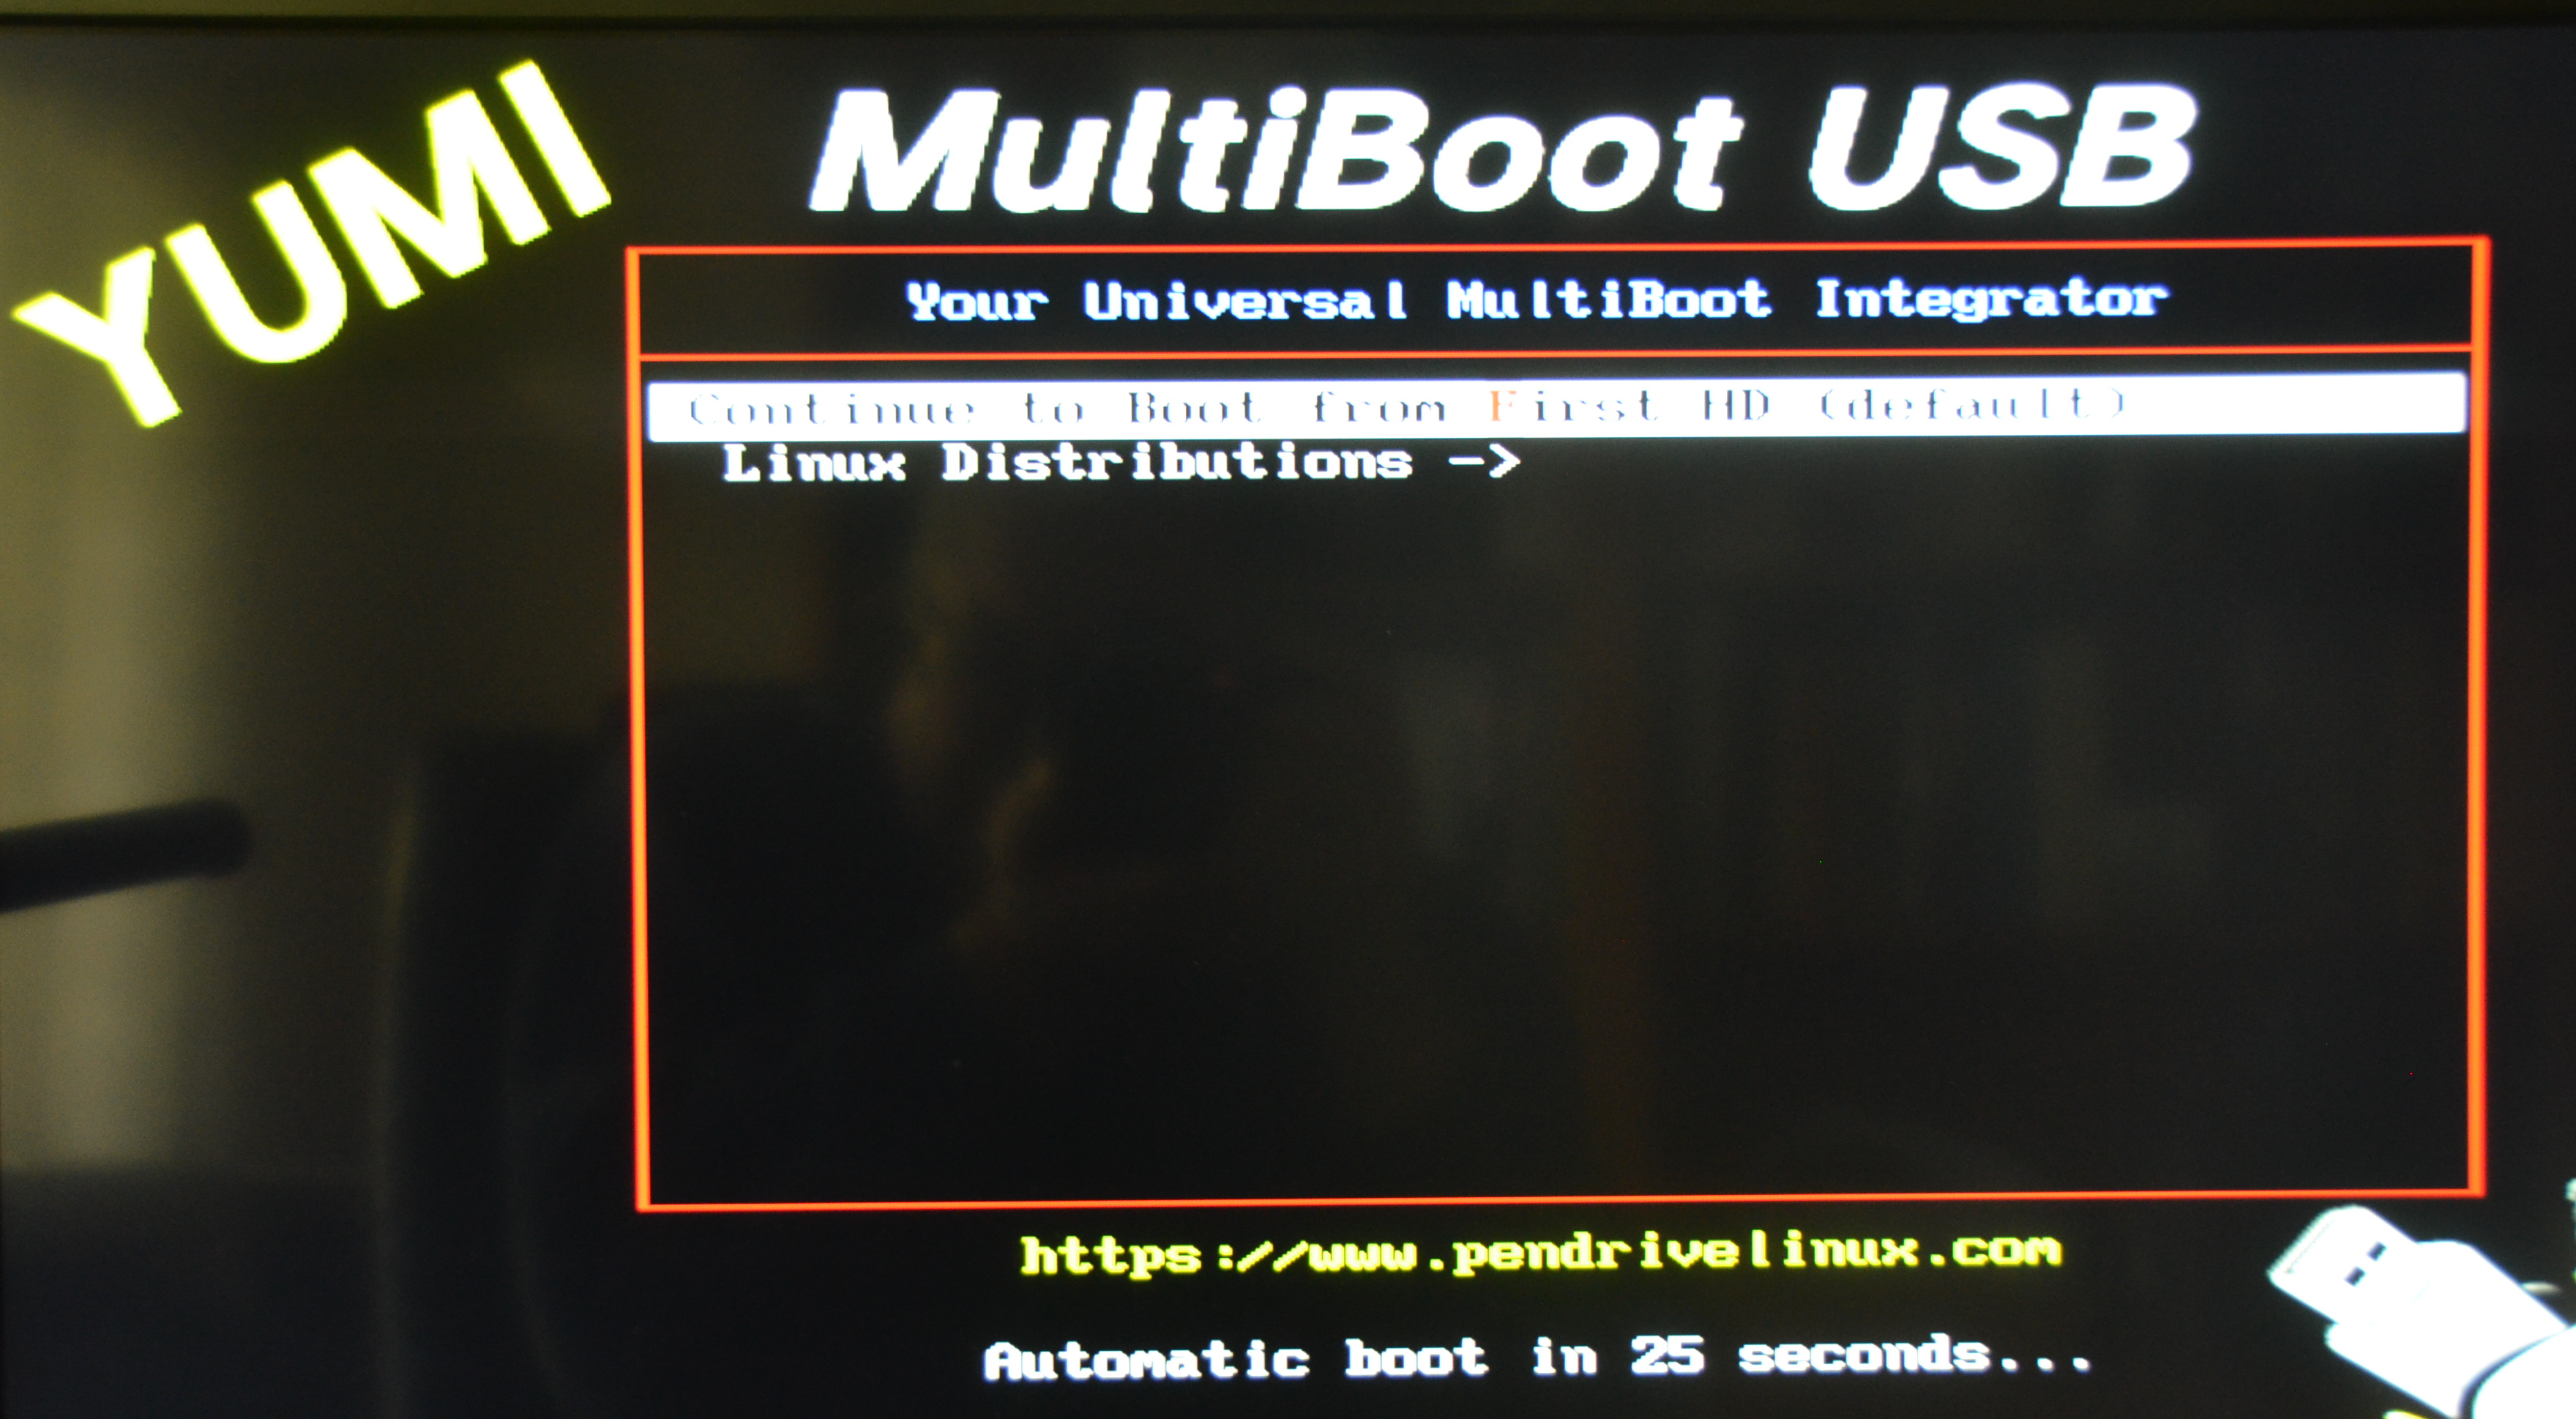
On the next menu use the down arrow key to select Linux Distribution of your choice to boot to.
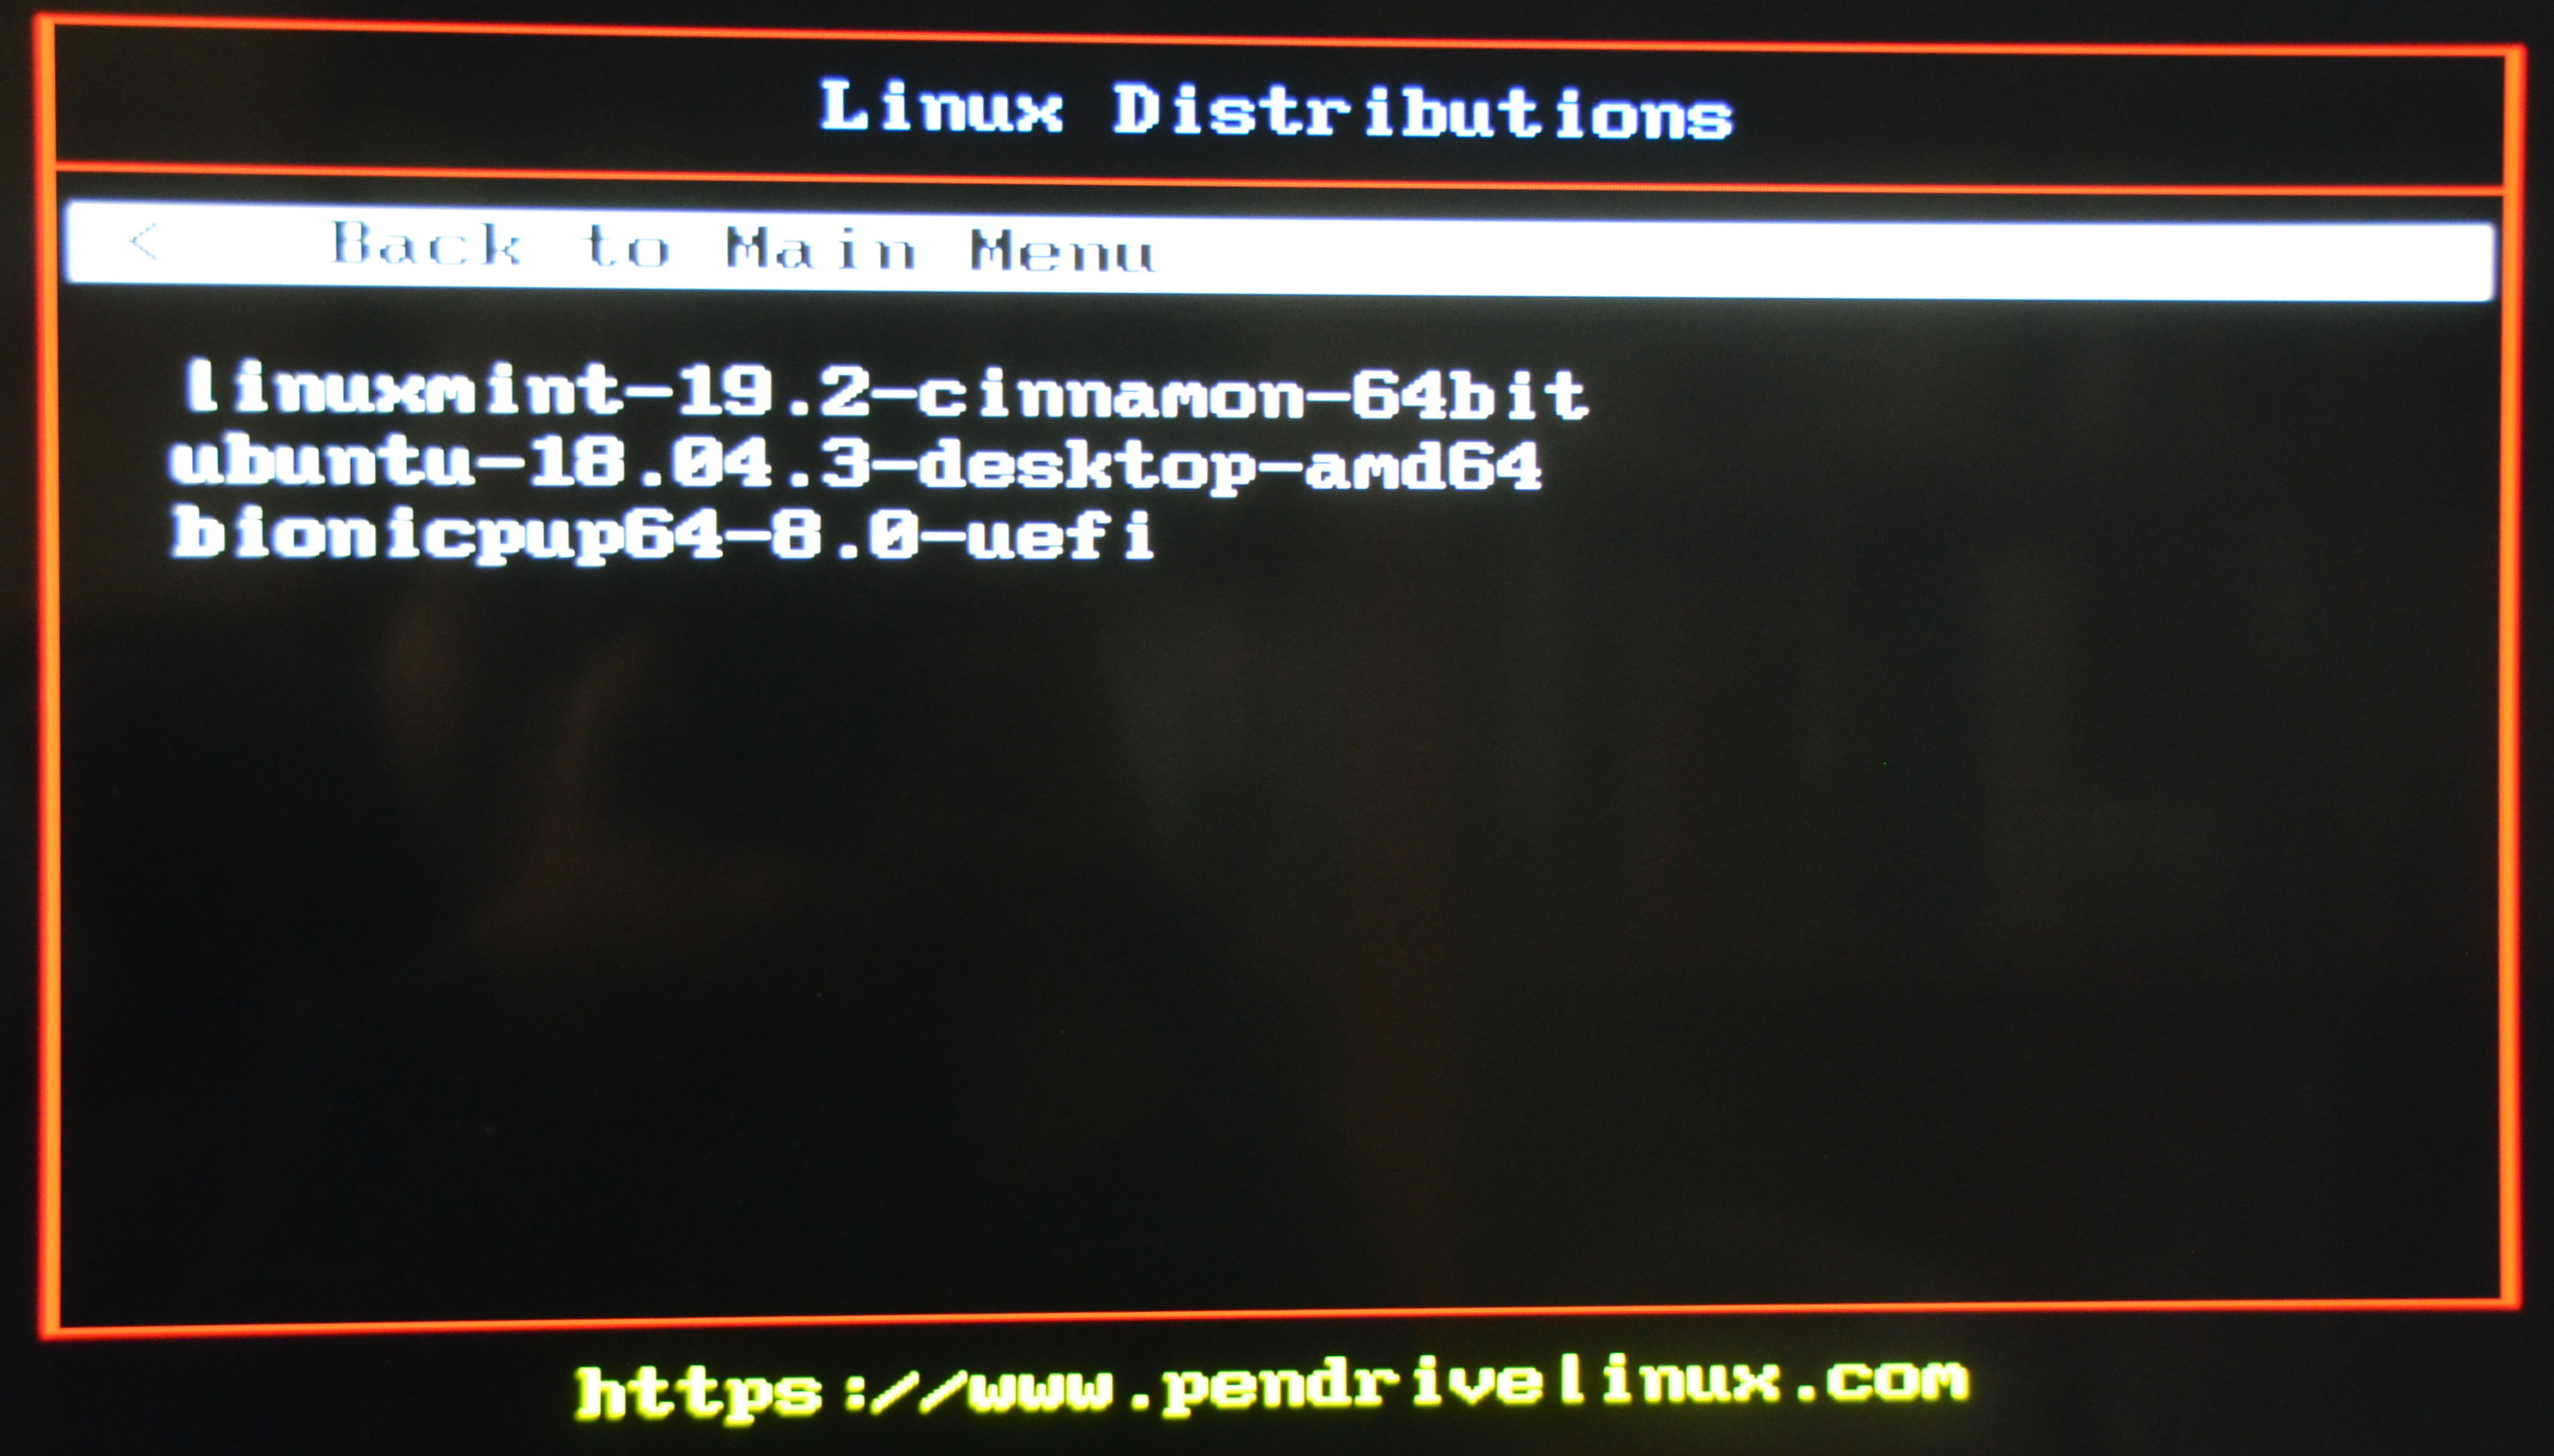
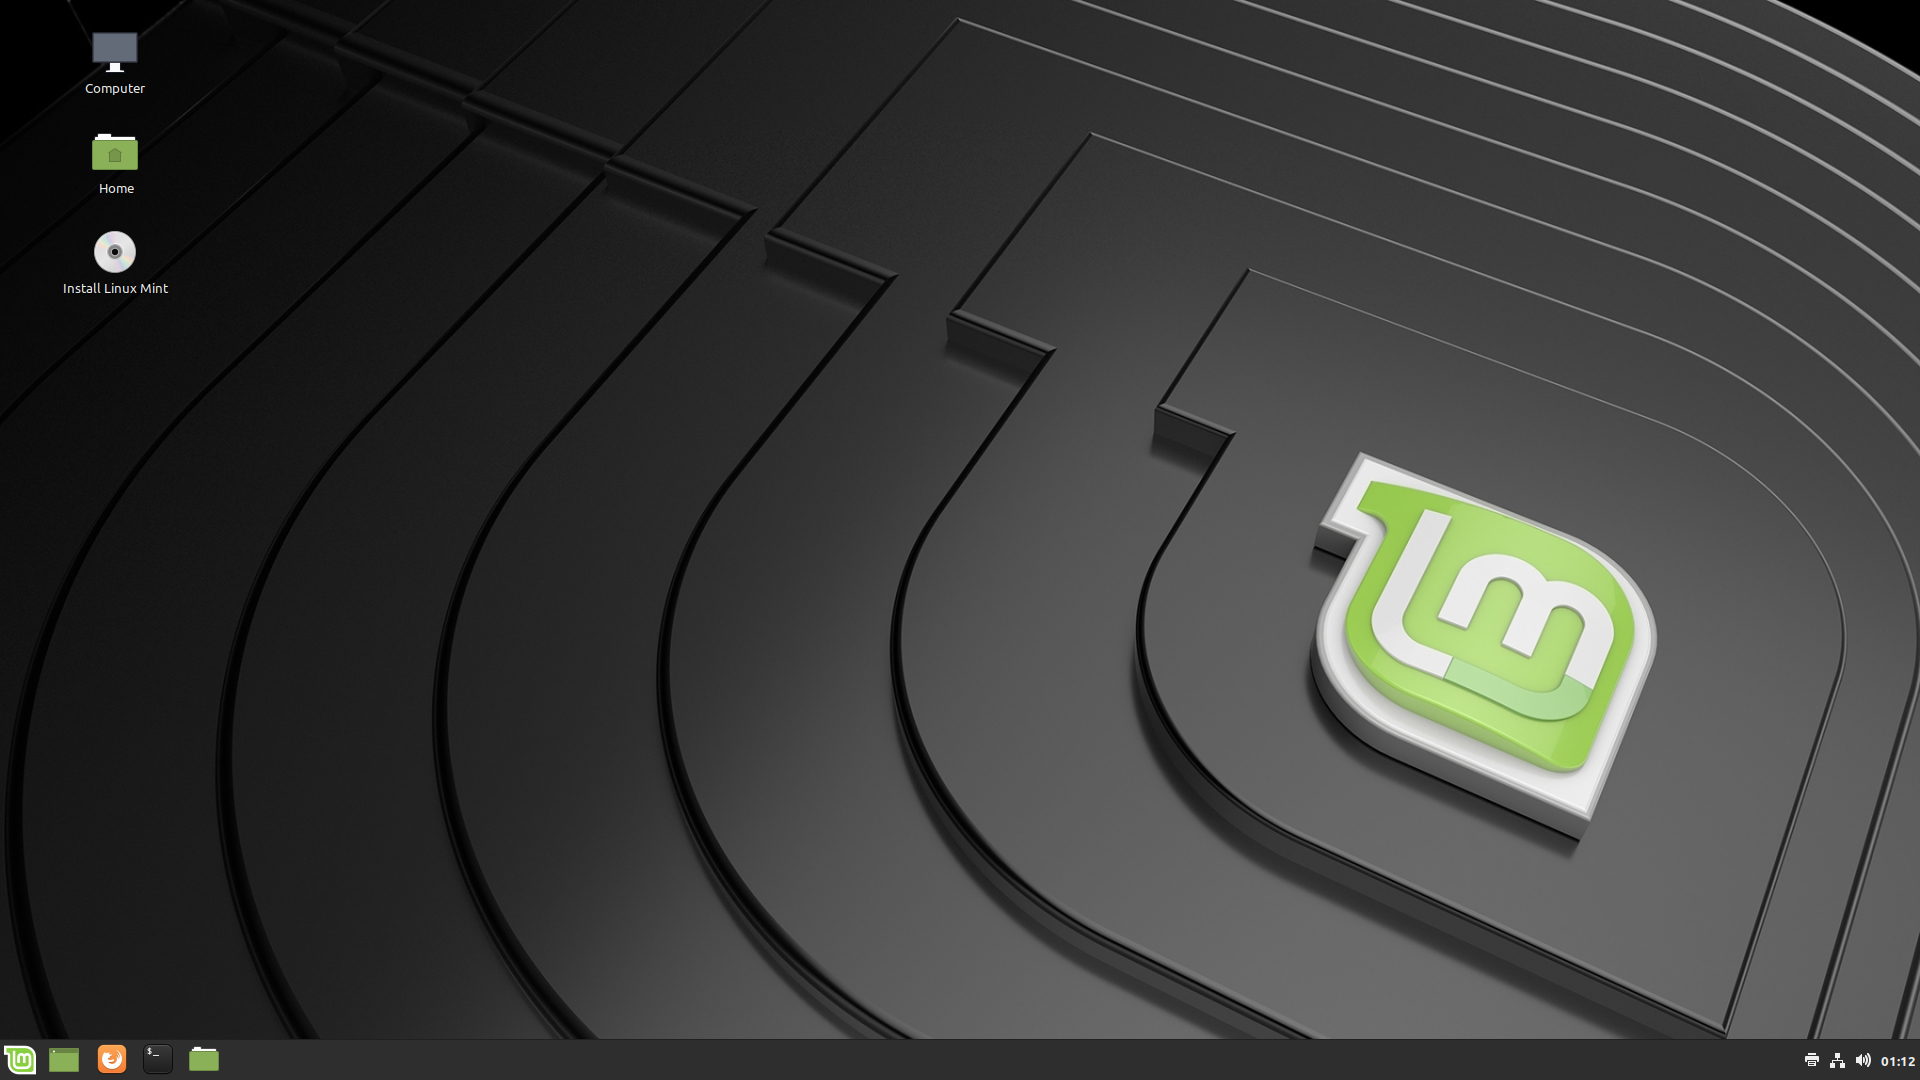
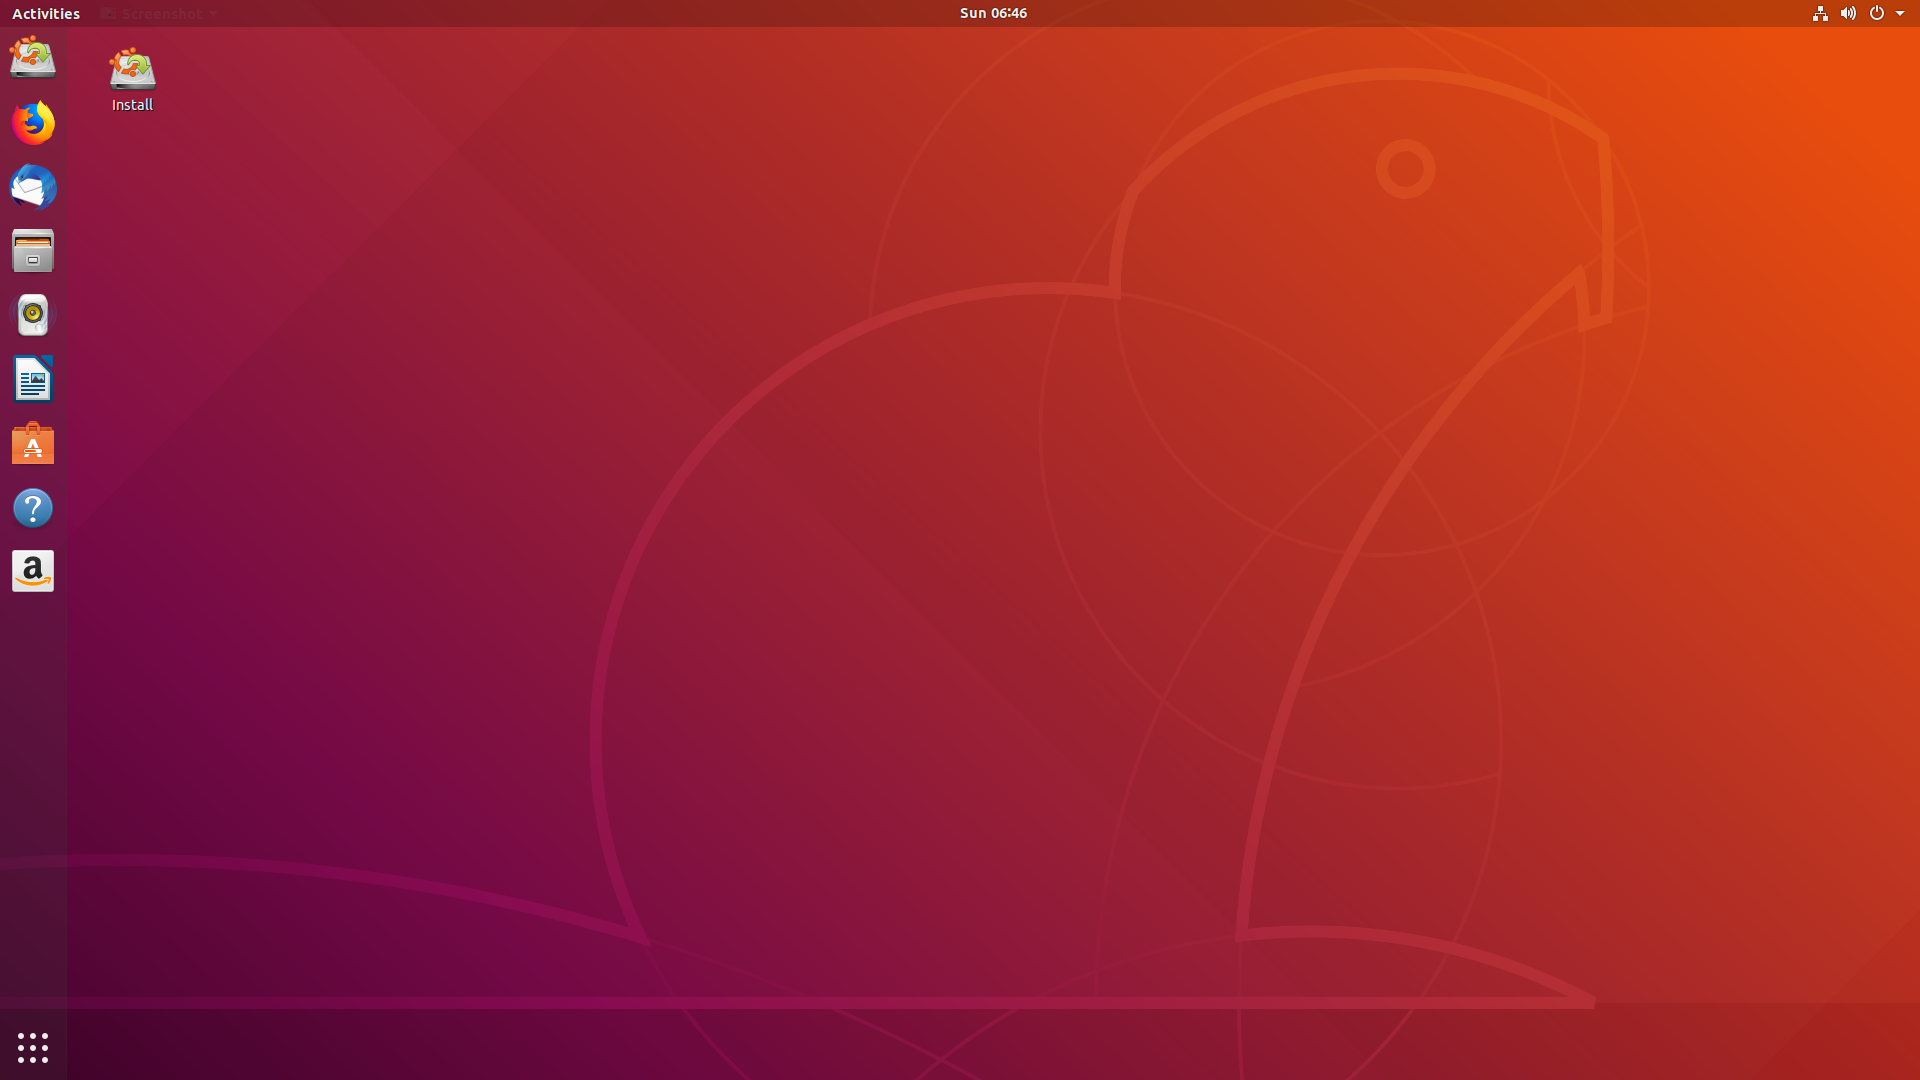
Here are the three Linux distributions written to our flash drive and booted to, with both Mint and Ubuntu able to save changes to settings and any added software apps.
We have successfully written three Linux distributions to a flash drive, and should you wish to remove any you can do so through YUMI. To do so open YUMI and select your flash drive with the distributions on and then click the box "View or Remove Installed Distros"
The click the down arrow to the right of Select a Distribution" Choose the distro to delete and then click Remove.

Give YUMI a try, it's a great tool for writing multiple bootable Linux versions to a single USB stick.
It must be stated that NOT ALL Linux distributions are compatible with persistence as we will demonstrate.
For this guide we will create a flash drive with the following Linux ISO files, of course you can use whatever distros you prefer.
- Linux Mint 19
- Linux Ubuntu 18
- Puppy Linux
To begin the procedure it is recommended you remove all other connected USB devices leaving only your USB flash drive you intend using to put the Linux distros on connected to your PC. This will lessen the chance of writing to a wrong USB device and losing data on it. Open YUMI and accept the license agreement.
Once YUMI is up and running tick the down arrow to the right of the USB selection box in step 1, then select your flash drive. This computer shows the flash drive as drive G, but yours may be different.
Now click the down arrow to the right of the distribution selection box in step 2 and select the Linux distro you would first like to put on your flash drive. We will opt to put a copy of Linux Mint on first so select it from the drop down list. This will insert Linux Mint into the selection box.
To complete step 3 click the browse button to the right of the browse and select box. This will open a Windows file explorer box where you can navigate to find your copy of Linux Mint. Highlight the file and select open.
Your selected distribution will now be displayed in the step 3 box.
Because Linux Mint supports persistence an additional step 4 will now appear, and here we choose to have persistence or not, and if so how much. To put Mint onto the flash drive without persistence just leave the slider at zero, or in this instance we will choose to have the maximum persistence space of 4GB by moving the slider to the right. Now click the Create button.
YUMI will display a summary of what is about to be written to the chosen USB drive. Please check this carefully as proceeding and writing to the incorrect drive will permanently destroy any data on that drive. Remember that your drive may not be drive G as shown on this computer. If all appears correct click Yes.
The progress boxes showing writing to the flash drive will display.
When complete click Next.
Now we are asked if we wish to add more distributions to our flash drive. Should you wish to add more distributions click Yes, or No to finish. Here we will opt to add another.
This will take us back to the opening screen of YUMI, so repeat steps 1 as above. This time we will put Linux Ubuntu on our flash drive so select it in step 2. In step 3 navigate to your ISO copy of Ubuntu and select it as we did previously for Mint. Set your preferred persistence and click Create.
Again you will be asked if you would like to write more distributions to your flash drive, so choose to or not. This time we will choose not to add more now. It's easy to add them later, simply start YUMI as you did originally and just add more as we did to start. Let's add one more, this time Linux Puppy.
Start YUMI as before, accept the license agreement.
Select your flash drive drive letter, Select your distribution, and navigate to its ISO file. Note below that Puppy has no persistence setting available as this version of Linux is not compatible with persistence, meaning changes made to Puppy will not be saved after shutdown. Click Create after you review your proposed changes.
Because we are adding another distribution after restarting YUMI we are asked if another partition can be created, select yes.
Linux Puppy will now be added to your bootable flash drive.
You can now continue to add distributions as above, or close YUMI and test it out. Of course you can always add more distros later as long as your flash drive has enough space.
To test out our new bootable menu driven USB first plug the USB into a computer and boot it. Depending on your motherboard you will have to tap a keyboard key whilst your machine is booting to select your USB boot drive. You will have to check your motherboard manual or internet to find the key to access your boot menu, but for Example for Gigabyte boards it's F12 and Asus it's F8.
Here is a typical boot menu
After selecting your flash drive a menu will appear, use the down arrow button to select Linux distributions.
On the next menu use the down arrow key to select Linux Distribution of your choice to boot to.
Here are the three Linux distributions written to our flash drive and booted to, with both Mint and Ubuntu able to save changes to settings and any added software apps.
We have successfully written three Linux distributions to a flash drive, and should you wish to remove any you can do so through YUMI. To do so open YUMI and select your flash drive with the distributions on and then click the box "View or Remove Installed Distros"
The click the down arrow to the right of Select a Distribution" Choose the distro to delete and then click Remove.
Give YUMI a try, it's a great tool for writing multiple bootable Linux versions to a single USB stick.
